A dripping sound in the middle of the night or a mysterious stain on your ceiling can send any homeowner into a panic. Roof leaks are sneaky culprits that, if ignored, can lead to costly repairs, structural damage, and even health hazards like mold growth. But here’s the good news: catching and addressing roof leaks early can save you thousands of dollars and preserve your home’s integrity. In this comprehensive guide, we’ll walk you through how to spot roof leaks before they spiral out of control and provide actionable steps to fix them. Whether you’re a DIY enthusiast or preparing to call a professional, this article will equip you with the knowledge to tackle roof leaks confidently.
Why Roof Leaks Are a Big Deal
Roof leaks might seem like a minor inconvenience, but they can escalate quickly. Water infiltrating your home can damage insulation, weaken structural beams, ruin drywall, and create a breeding ground for mold and mildew. According to the National Roofing Contractors Association, unaddressed roof leaks can lead to repair costs ranging from $1,000 to $10,000, depending on the extent of the damage. Early detection and repair are critical to preventing these issues from snowballing.
This guide covers everything you need to know about identifying signs of roof leaks, understanding their causes, and taking steps to fix them. We’ll also share preventative tips to keep your roof in top shape. Let’s dive in.
Common Signs of Roof Leaks
Spotting a roof leak early requires knowing what to look for. Here are the most common indicators that your roof might be letting water in:
-
Water Stains on Ceilings or Walls
Brownish or yellowish stains on your ceiling or walls are telltale signs of water infiltration. These stains often appear as discolored patches and may grow over time if the leak persists.
-
Dripping or Pooling Water
If you hear dripping or notice water pooling in your home, especially during or after rain, it’s a clear sign of a leak. Check areas like attics, crawlspaces, or rooms directly beneath the roof.
-
Damaged or Missing Shingles
Inspect your roof for cracked, curled, or missing shingles. These vulnerabilities allow water to seep through the roof’s protective layers.
-
Mold or Mildew Growth
A musty smell or visible mold in your attic or upper rooms can indicate moisture from a leak. Mold thrives in damp environments, so this is a red flag.
-
Peeling Paint or Wallpaper
Moisture from a leak can cause paint or wallpaper to bubble or peel, especially near the ceiling or exterior walls.
-
Sagging Roof Deck
If your roof appears to sag or feels soft underfoot in certain areas, water may have weakened the underlying structure.
-
Clogged or Damaged Gutters
Overflowing or damaged gutters can cause water to back up and seep under roof edges, leading to leaks.
By regularly checking for these signs, you can catch leaks early and prevent extensive damage. But what causes these leaks in the first place? Let’s explore.
Causes of Roof Leaks
Understanding the root causes of roof leaks can help you address them effectively. Common culprits include:
- Aging Roof Materials: Asphalt shingles, the most common roofing material, typically last 20-30 years. Over time, they can crack, curl, or lose granules, making them less effective at repelling water.
- Improper Installation: Poorly installed flashing, shingles, or vents can create gaps where water can enter.
- Storm Damage: High winds, hail, or falling branches can damage shingles or puncture the roof membrane.
- Clogged Gutters: Debris-filled gutters prevent proper drainage, causing water to pool and infiltrate under shingles.
- Cracked Flashing: Flashing around chimneys, skylights, or vents can crack or loosen, allowing water to seep through.
- Ice Dams: In colder climates, ice dams can form on roof edges, forcing water under shingles and into your home.
Identifying the cause of a leak is the first step toward fixing it. Now, let’s move on to how you can locate and address the problem.
How to Spot Roof Leaks: A Step-by-Step Approach
Finding a roof leak can feel like searching for a needle in a haystack, but a systematic approach makes it manageable. Follow these steps to pinpoint the source of the leak:
Step 1: Inspect the Attic
Start by checking your attic during or shortly after a rainstorm. Use a flashlight to look for water stains, damp insulation, or puddles. Pay close attention to areas near vents, chimneys, or skylights, as these are common leak points.
Step 2: Trace Water Stains
If you notice stains on your ceiling or walls, trace them upward to their highest point. This can help you identify the entry point of the water. Keep in mind that water can travel along beams or pipes, so the source may not be directly above the stain.
Step 3: Check the Roof Exterior
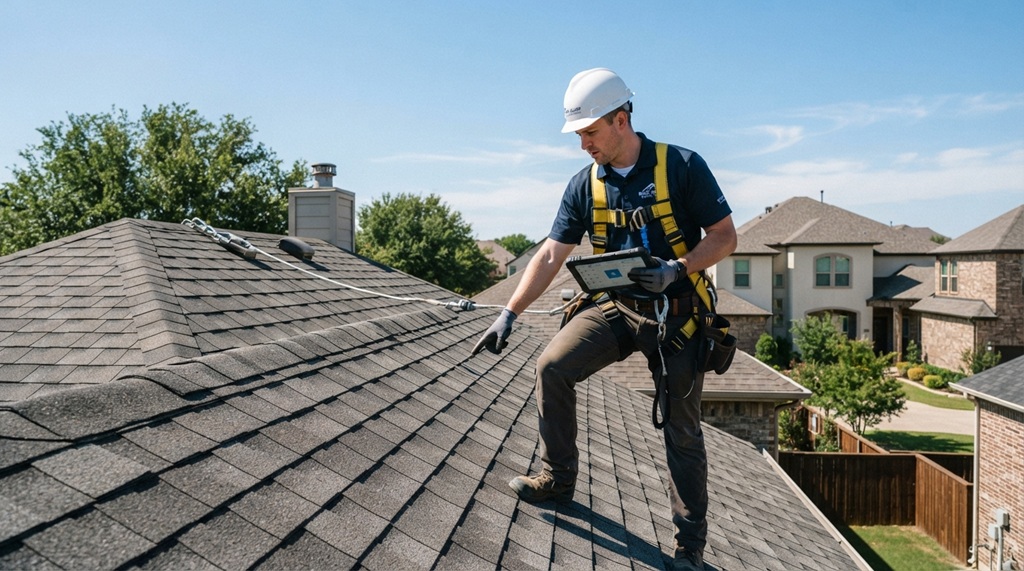
Safely climb onto your roof (or use binoculars from the ground) to inspect for visible damage. Look for missing or damaged shingles, cracked flashing, or debris buildup. Pay special attention to seams, valleys, and areas around roof penetrations like vents or chimneys.
Step 4: Perform a Water Test
If you can’t find the leak, enlist a helper and perform a water test. Have one person on the roof gently spraying water with a hose while another person checks the attic or interior for signs of water intrusion. Start at the lowest point of the roof and work your way up to avoid unnecessary water damage.
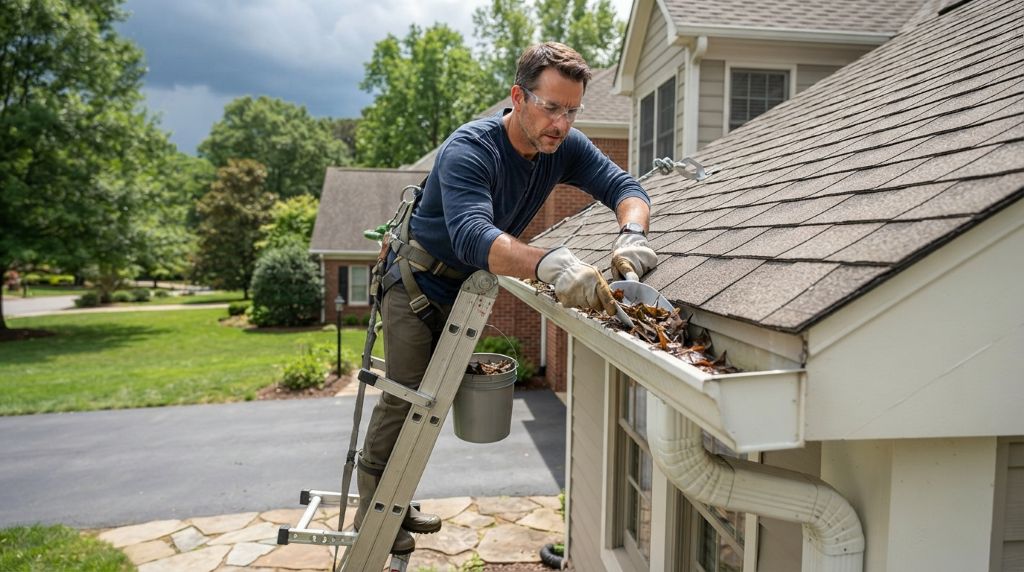
Step 5: Check Gutters and Downspouts
Ensure gutters are clear of debris and downspouts are directing water away from your home’s foundation. Clogged gutters can cause water to back up and seep under the roof.
Safety Tip: If you’re uncomfortable working at heights or lack the proper equipment, hire a professional roofer to inspect and repair your roof.

How to Fix Roof Leaks
Once you’ve identified the leak, it’s time to fix it. The appropriate repair depends on the severity and cause of the leak. Here are common solutions for minor leaks, along with when to call a professional:
DIY Fixes for Minor Leaks
For small leaks or temporary repairs, you can take the following steps:
- Patch Damaged Shingles: Replace cracked or missing shingles with new ones. Lift the edges of surrounding shingles, remove old nails, and slide the new shingle into place. Secure it with roofing nails and seal with roofing cement.
- Seal Flashing: If flashing around chimneys or vents is cracked, apply roofing sealant or caulk to close gaps. For larger cracks, replace the flashing entirely.
- Clear Gutters: Remove debris from gutters to ensure proper drainage. Consider installing gutter guards to prevent future clogs.
- Apply Roof Sealant: For small holes or cracks, apply a high-quality roofing sealant or patch kit. Follow the manufacturer’s instructions for best results.
When to Call a Professional
Some leaks require professional expertise. Contact a licensed roofer if you encounter:
- Extensive shingle damage or large holes.
- Structural damage, such as a sagging roof deck.
- Leaks near electrical components.
- Complex repairs involving skylights, chimneys, or intricate flashing.
Professional roofers have the tools and experience to handle complex repairs safely and effectively. They can also assess whether your roof needs a full replacement rather than a patch.
Preventing Future Roof Leaks
Prevention is the best defense against roof leaks. Incorporate these maintenance tips into your routine to keep your roof in top condition:
- Schedule Regular Inspections: Inspect your roof at least twice a year, ideally in spring and fall, to catch potential issues early.
- Clean Gutters Regularly: Clear debris from gutters and downspouts to ensure proper drainage.
- Trim Overhanging Branches: Prevent branches from scraping or falling onto your roof during storms.
- Check Flashing and Seals: Ensure flashing around roof penetrations is secure and sealed.
- Address Ice Dams: In winter, remove snow from roof edges to prevent ice dams. Consider installing a roof heating system in colder climates.
- Maintain Proper Ventilation: Ensure your attic is well-ventilated to prevent moisture buildup, which can weaken roofing materials.
By staying proactive, you can extend the lifespan of your roof and avoid costly repairs.
The Cost of Ignoring Roof Leaks
Ignoring a roof leak can lead to serious consequences. Water damage can compromise your home’s structural integrity, leading to expensive repairs. Mold growth can pose health risks, particularly for those with allergies or respiratory issues. Additionally, leaks can increase energy costs by damaging insulation, forcing your HVAC system to work harder.
Investing in timely repairs or preventative maintenance is far more cost-effective than dealing with extensive damage down the line. For example, replacing a few shingles might cost $100-$300, while repairing water-damaged walls or insulation can easily exceed $5,000.
Call to Action: Take Control of Your Roof’s Health
Don’t let a small drip turn into a big problem. Start by inspecting your roof for signs of leaks today, especially if you’ve noticed stains, drips, or damaged shingles. If you’re comfortable with DIY repairs, tackle minor issues like patching shingles or sealing flashing. For complex problems or peace of mind, contact a trusted roofing professional to assess and fix the issue.
Have you spotted a potential leak or tackled a roof repair yourself? Share your experience in the comments below, or reach out to a local roofer for a free inspection. Protect your home and save money by addressing roof leaks before they get worse!
Read More: